
Episode 5 - Slice and Dice Data using grep, head, tail, cut, sort, tr, uniq and wc
Welcome to Episode 6 of the “Head in the Clouds” Video Series. I am Ken Hartman, a SANS Certified Instructor and content creator for the SANS Cloud Security Curriculum.
Today’s episode is titled: “Slice and Dice Data using grep, head, tail, cut, sort, tr, uniq and wc.”
The purpose of HITC is to teach foundational cloud skills and security knowledge that will help others thrive in the cloud. The content ideas come from my personal observation of skills that I see some students lacking when they show up to a SANS Cloud Security course. Other ideas are passed on from fellow SANS instructors.
Today’s topic builds upon our last episode which was titled “Tips for success with Command Line Interfaces using BASH.” While the last episode provided useful skills for navigating the BASH shell when using a CLI, this episode is focused on manipulating the data that is returned by such commands.
The commands that we will be covering are grep, head, tail, cut, sort, tr, uniq and wc. These utilities are commands that I use almost every day and I highly recommend that you add them to your arsenal.
To start, we must have some data to work with. And since we are building cloud security skills, let’s use some data from the cloud. Amazon Web Services has a report that we can download that contains a list of all IAM users in each AWS Account. This is called the “Credentials Report” and it is a great way to audit user accounts. You can learn more about the credential report at: https://docs.aws.amazon.com/IAM/latest/UserGuide/id_credentials_getting-report.html
I have created a sample credential report that you can use to follow along as we explore the commands that we will be covering. Once you have opened a Linux terminal, you can download the file using wget as shown:
wget https://headintheclouds.site/extras/ep6/credential_report.csv
Let’s take a look at the file:
cat credential_report.csv
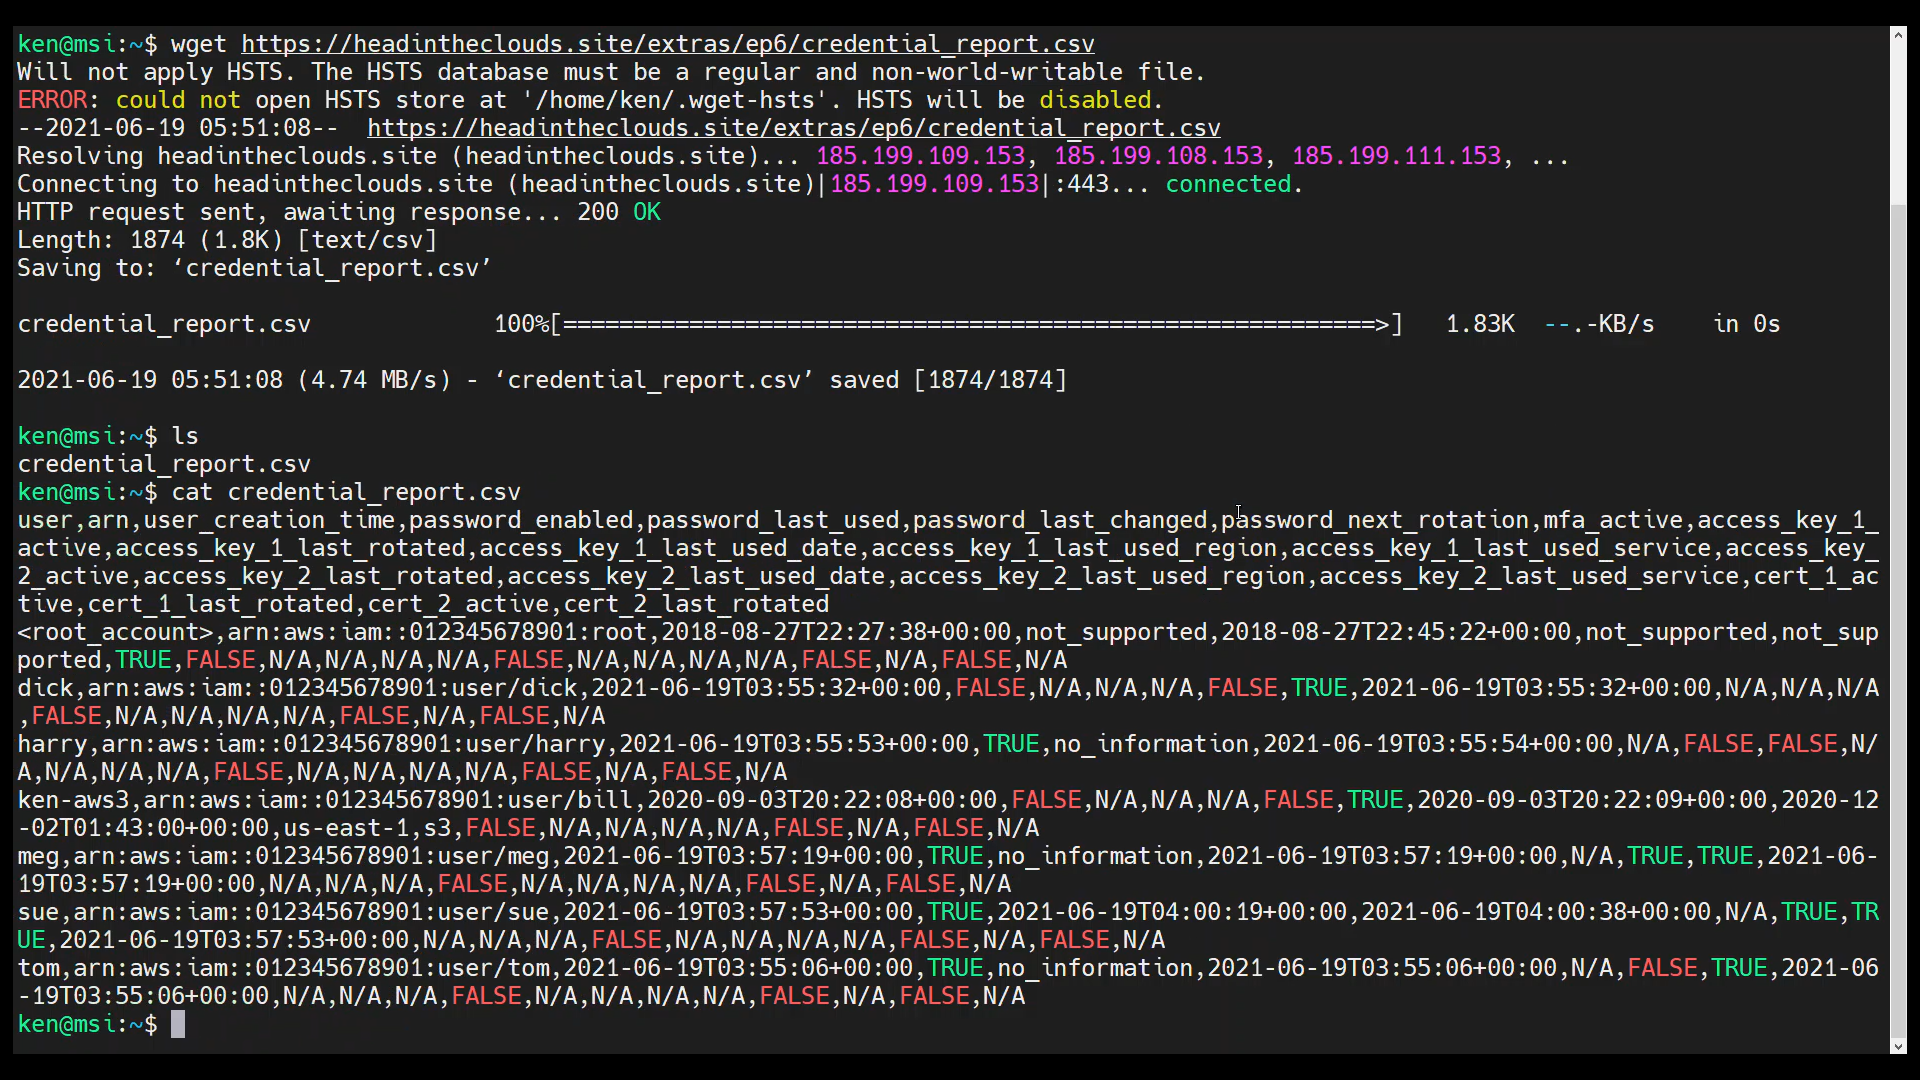
As we can see, the first line has the headings for each column in the comma separated value (CSV) file. To get just the first line displayed to stdout, we can use the head command, like so:
head -n1 credential_report.csv

By default, the head command will print the first ten lines of a file, unless we override that with the “-n” option. In this case, we told head to print just the first line using “-n1”
In Linux, it is a common practice to pipe the output of one command into another. To do that we use the pipe symbol, which is the vertical bar (|). We will use this technique to illustrate our next command, tr. The tr command allows us to substitute one character for another.
As an example, we could substitute the comma for an asterisk using the following command:
head -n1 credential_report.csv | tr "," "*"

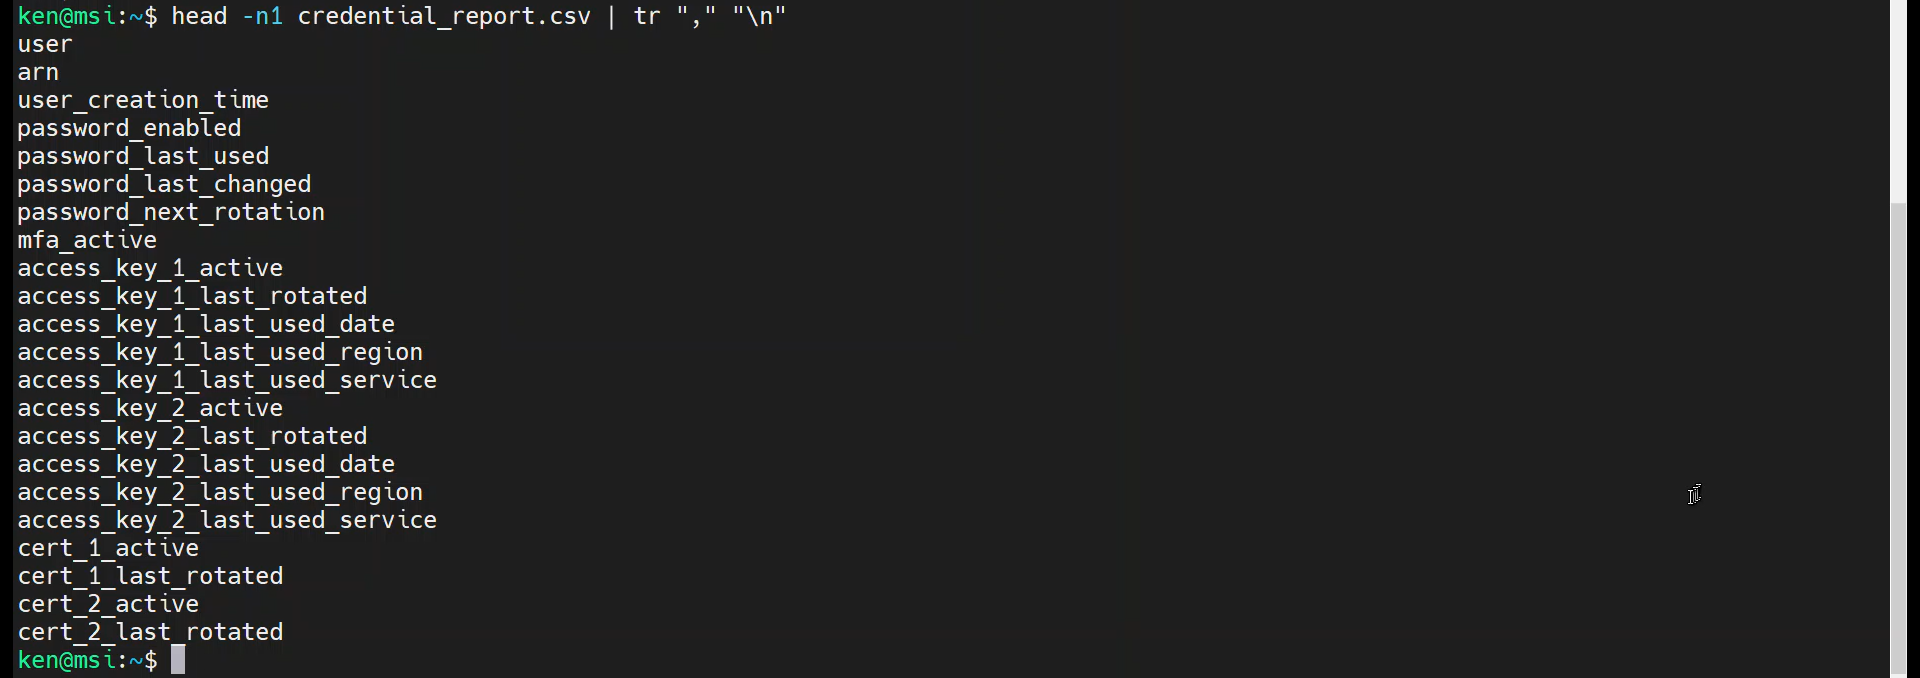
Note that we can even use control characters such as tabs or line feeds. Let’s rerun the command but substitute in a line feed:
head -n1 credential_report.csv | tr "," "\n"
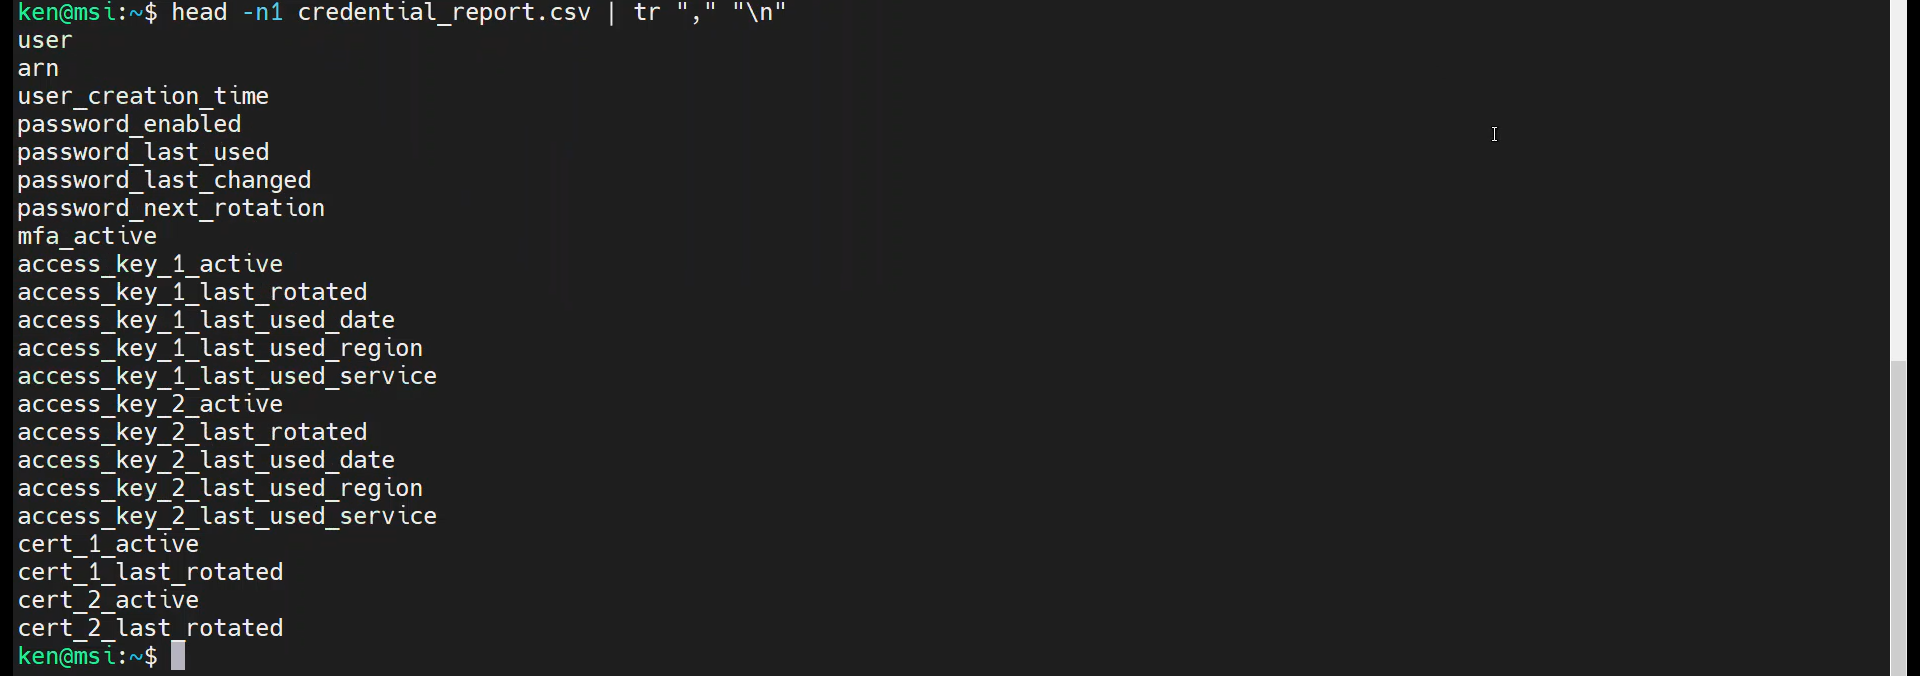
There, that is much easier to read. Now, what if we only wanted to see the “user”, “arn,” user_creation_time,” and “mfa_active” fields? This is where the cut command shines.
When using cut, we need to tell it what character to use as a delimiter and the field numbers to return to standard output. Thus, the command that we want to use is:
head -n1 credential_report.csv | cut -d"," -f1-3,8

As you can see, we pass in the delimiter using the “-d” option, and the fields to use using the “-f” option. Now, that we have selected the fields that we are interested in, we can look at all rows by using the cat command in place of head.
cat credential_report.csv | cut -d"," -f1-3,8

Let’s refine our output further by including only the “user” and “mfa_active” fields:
cat credential_report.csv | cut -d"," -f1,8

Perhaps we want to generate a list of users who did not have MFA on their user accounts. In that case we can use “grep” to return just the rows where the mfa_active column contains “FALSE”.
cat credential_report.csv | cut -d"," -f1,8 | grep "FALSE"

Notice that by default, grep is case-sensitive. For example, we will not get any results if we use:
cat credential_report.csv | cut -d"," -f1,8 | grep "false"

That said, we can override this with the “-i” option, as shown:
cat credential_report.csv | cut -d"," -f1,8 | grep -i "false"

Next, let’s take another look at the list of all of our users again:
cat credential_report.csv | cut -d"," -f1,8

How could we remove the root_account from the result set? We could use the “-v” option with grep:
cat credential_report.csv | cut -d"," -f1,8 | grep -v "<root_account>"

Perhaps we want to know which user (besides root) was the first to be created? How would we determine that using our command line utilities?
First, we need to identify the field numbers to cut:
head -n1 credential_report.csv | tr "," "\n"
Ok, it looks like we want fields one and three. Use cut to extract them.
cat credential_report.csv | cut -d"," -f1,3

Next, let’s drop the first line that contains the headings of each column. To do that, we will use a special feature of the tail command. Normally, tail works the opposite of the head command. While head displays the top 10 lines of a file, by default, tail displays the last 10 lines.
By the way, tail has a great option for monitoring a log file as it is being written. This is the “-f” option. Remember that as “f as in follow.”
In our case, we want all of the lines except the first, so we will use “+2” as our optional argument to the command. This tells tail to start at line 2 and output that line and all of the rest.
So, use:
cat credential_report.csv | cut -d"," -f1,3 | tail +2

Next, filter out the root account using grep -v
cat credential_report.csv | cut -d"," -f1,3 | tail +2 | grep -v "<root_account>"

Note: We could have just had the tail command start at line 3, which would also have excluded the line with the root account, but that makes an assumption that the root account will always be in the second line. That type of an assumption may be fine for an ad hoc analysis, but not something you would want to do when developing a script.
Now to perform the sort. Notice that the data that we are interested in sorting is in the second column. We need to tell sort to use the second column. We do that with the “-k” option, as follows:
cat credential_report.csv | cut -d"," -f1,3 | tail +2 | grep -v "<root_account>" | sort -k2

We could reverse the sort order by passing in the “-r” option:
cat credential_report.csv | cut -d"," -f1,3 | tail +2 | grep -v "<root_account>" | sort -k2 -r

If you wonder how many IAM users are listed in the Credential Report, we can use the word count utility, wc. By default, wc prints the number of lines, words, and bytes for a file. To get just the line count, use the “-l” option.
cat credential_report.csv | cut -d"," -f1,3 | tail +2 | grep -v "<root_account>" | wc -l

And based on the results of this command, we can see that we have six IAM users, because the root account does not count as an IAM user. Sure we could have hand-counted these, but this utility is great when there are hundreds of lines in the output.
For another scenario, let’s say we want to determine how many users have MFA configured and how many do not. How could we generate these metrics?
First, let’s revisit the prior analysis we performed on MFA:
cat credential_report.csv | cut -d"," -f1,8
Good. Now remove the header line and the root account as before:
cat credential_report.csv | cut -d"," -f1,8 | tail +2 | grep -v "<root_account>"

Now, lets chop off the user names:
cat credential_report.csv | cut -d"," -f1,8 | tail +2 | grep -v "<root_account>" | cut -d"," -f2

And then sort it:
cat credential_report.csv | cut -d"," -f1,8 | tail +2 | grep -v "<root_account>" | cut -d"," -f2 | sort

Now we can pipe it into uniq as shown:
cat credential_report.csv | cut -d"," -f1,8 | tail +2 | grep -v "<root_account>" | cut -d"," -f2 | sort | uniq

Well, that didn’t give us the counts we were expecting, did it? Turns out, we were missing the “-c” option.
Let’s try that:
cat credential_report.csv | cut -d"," -f1,8 | tail +2 | grep -v "<root_account>" | cut -d"," -f2 | sort | uniq -c

Note: the uniq utility assumes that the input is sorted. To illustrate what I mean, remove the sort command:
cat credential_report.csv | cut -d"," -f1,8 | tail +2 | grep -v "<root_account>" | cut -d"," -f2 | uniq -c

Wrap Up
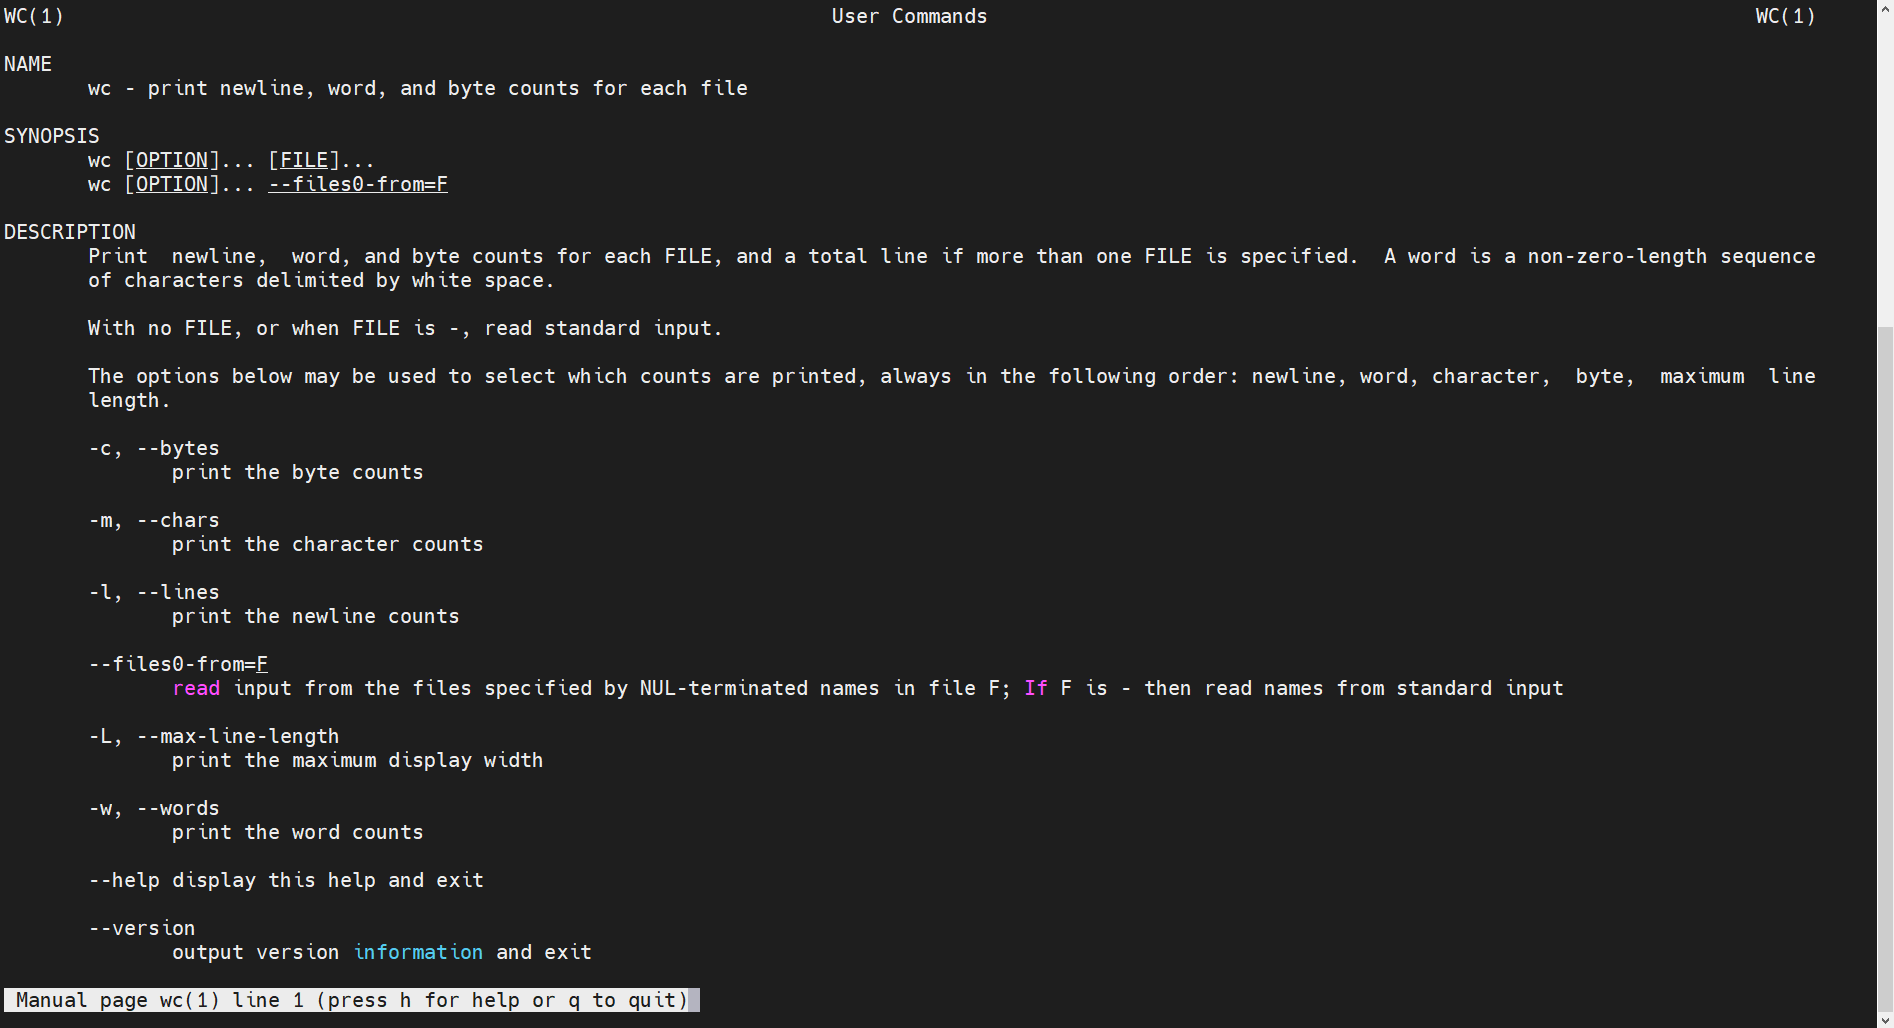
That’s it! Now you know some very useful command line utilities to slice and dice data. Each of these utilities have many options that we have not explored. Remember that you can always use the man page to get the details on how to use the command, along with the list of supported options. For example to see the options supported by wc, just run
man wc
If you have thoughts or comments on today’s episode, feel free to chime in on the comments for this YouTube video.
If you appreciate this video and want to see more like it, be sure to give it a “thumbs up.”
Stay tuned for another installment of “Head in the Clouds” as announcements of new episodes are made on the SANS Cloud Security Twitter feed.
Meanwhile, be sure to check out the other great videos on the SANS Cloud Security YouTube Channel.
Take care.