
Episode 4 - Use Terraform to Provision a Google Compute instance
Welcome to Episode 4 of the “Head in the Clouds” Video Series. I am Ken Hartman, a SANS Certified Instructor and content creator for the SANS Cloud Security Curriculum.
Today’s episode is titled: “Use Terraform to Provision a Google Compute instance”
This video is a demonstration on how to deploy a Google Compute Engine instance using terraform, complete with sample code.
Back in March of this year (2021), I did a 90 minute SANS Tech Tuesday workshop called “Use Terraform to Provision Your Own Cloud Based Remote Browsing Workstation.” That workshop was essentially a tutorial on using both Terraform and Github to create a configured AWS Elastic Compute Instance.
That video can be found at https://youtu.be/5L6yxXXn0-I. Since the Tech Tuesday workshop was focused on AWS, I decided to do this episode of “Head in the Clouds” as a follow-up and focus on deploying a GCE instance, since the Terraform provider and access control work differently.
Generate a SSH Key Pair for Use in this Demo
First, we need to generate a SSH key pair. Simply type ssh-keygen at the prompt and accept the defaults. The output will look something like:
ubuntu@ubuntu:~$ ssh-keygen
Generating public/private rsa key pair.
Enter file in which to save the key (/home/ubuntu/.ssh/id_rsa):
Enter passphrase (empty for no passphrase):
Enter same passphrase again:
Your identification has been saved in /home/ubuntu/.ssh/id_rsa
Your public key has been saved in /home/ubuntu/.ssh/id_rsa.pub
The key fingerprint is:
SHA256:1HXgtAWZAYtmuP6vRE9r7uLfRDC5SLjzbWVgLhU3E9k ubuntu@ip-172-31-90-223
The key's randomart image is:
+---[RSA 3072]----+
|          o.@Xo  |
|       o o O+*E  |
|      o * X o    |
|       B = =     |
|      + S + +    |
|     . + = =     |
|      . o * .    |
|       o.+ o     |
|       .+*= .    |
+----[SHA256]-----+
This creates the two files in the .ssh directory:
- id_rsa
- id_rsa.pub
We can examine the contents of the public key using cat .ssh/id_rsa.pub as shown:
ubuntu@ubuntu:~$ cat .ssh/id_rsa.pub
ssh-rsa AAAAB3NzaC1yc2EAAAADAQABAAABgQDbcBCogxJw6vWLYJxQVA1NP/PbmrNc4QL8upLqvmSN/kn03Jiw+iOr2pxIZwjLMHI5xGtndlIstNjh6wEjzH1YexZvtrf5Gw0BLf144k7YN1Yig6p/nbEUbKhEsIIQV77pOUhqdcJFGNg0AxBLzeZ7uCDDzYyTQtjIiGSKf4e8ATcnnZyP9viMI1LBEDJItwra/v1nM5OWS54U7bj8APwYzEYYVX84cj/reHl48gSmwj5G2kOwtAJwegU5oTt2Y3gsiteTxT0GMXgVM5qigns1TBVjsW749YtHcTv4PApRRCxkdE468b9uaY/jgu4Fic7u6KcE4vay2EKS7GpobXntU/iLqX1SQetG2D1YW/dH7OivIMBNJ5dxXDEDMhXwfTeW+bA3VR7e7BGK8GXRAIY9u7z2zLLauV4RC8fyLgXFnxPth2bqNiDww11l21wLHUjsrJ4djg4wltMktvvMdtUzXJ0nIwUQXSFsyRxDYXW/xgtQ+udcsVfvCEDklMmycbM= ubuntu@ubuntu
Note that your public key material will be different than what is shown above.
This key will be inserted into our GCE instance at boot time by Terraform. The private key (id_rsa) will be used by the SSH client to authenticate to this GCE instance.
Create a GCP Project and a Service Account
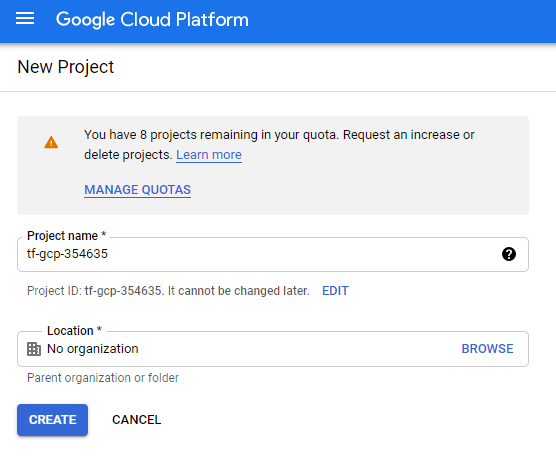
Next, lets create a dedicated GCP project and a Service Account. Log into the GCP Cloud Console and create a new project. Use a name similar to “tf-gcp-“ plus six random digits so that the project name is globally unique.
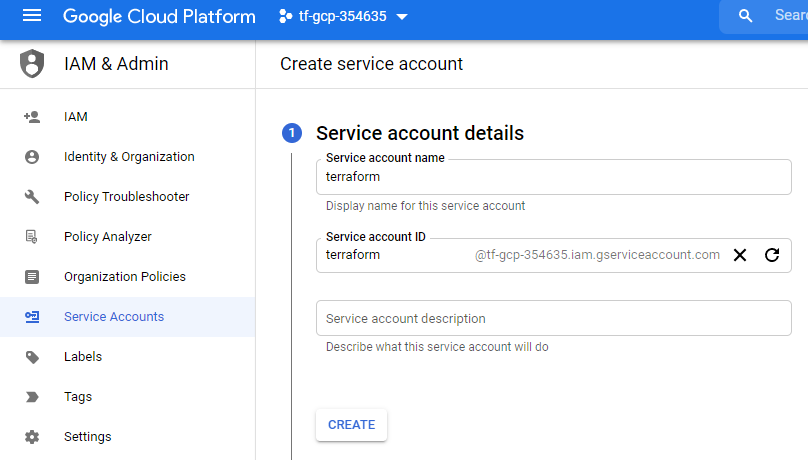
Create a service account named “terraform”
Attach the “Compute Admin” role to the service account.
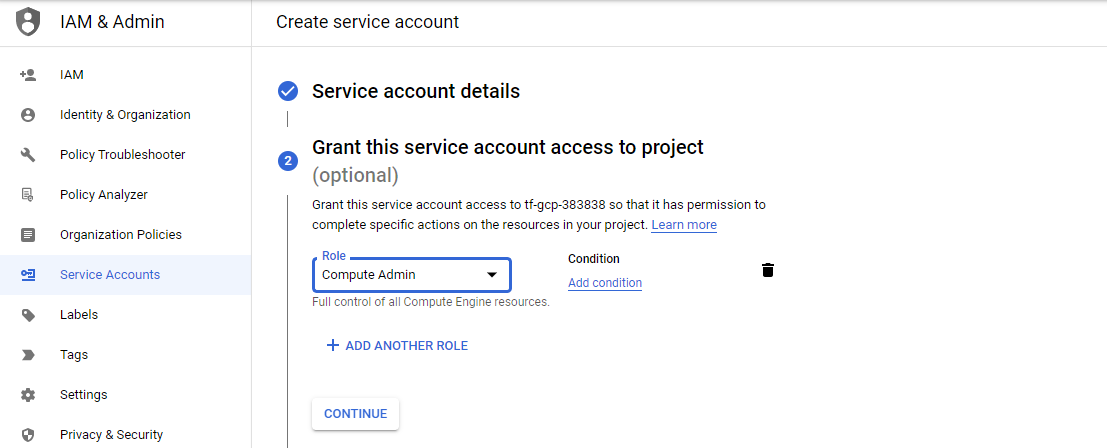
Click “Done.” Next, click “Manage Keys” under the Actions heading. Then click “ADD KEY” and select “Create new key.”
Select “JSON” as the format and click “CREATE.”
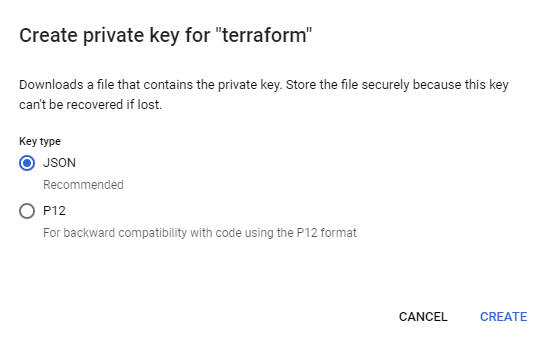
This will generate a JSON file that grants the holder full access to the project, so it must be carefully protected.
NOTE: For the purposes of this demo, I will be exposing my key. But by the time you view this video the key pair and the GCP project will have been deleted.
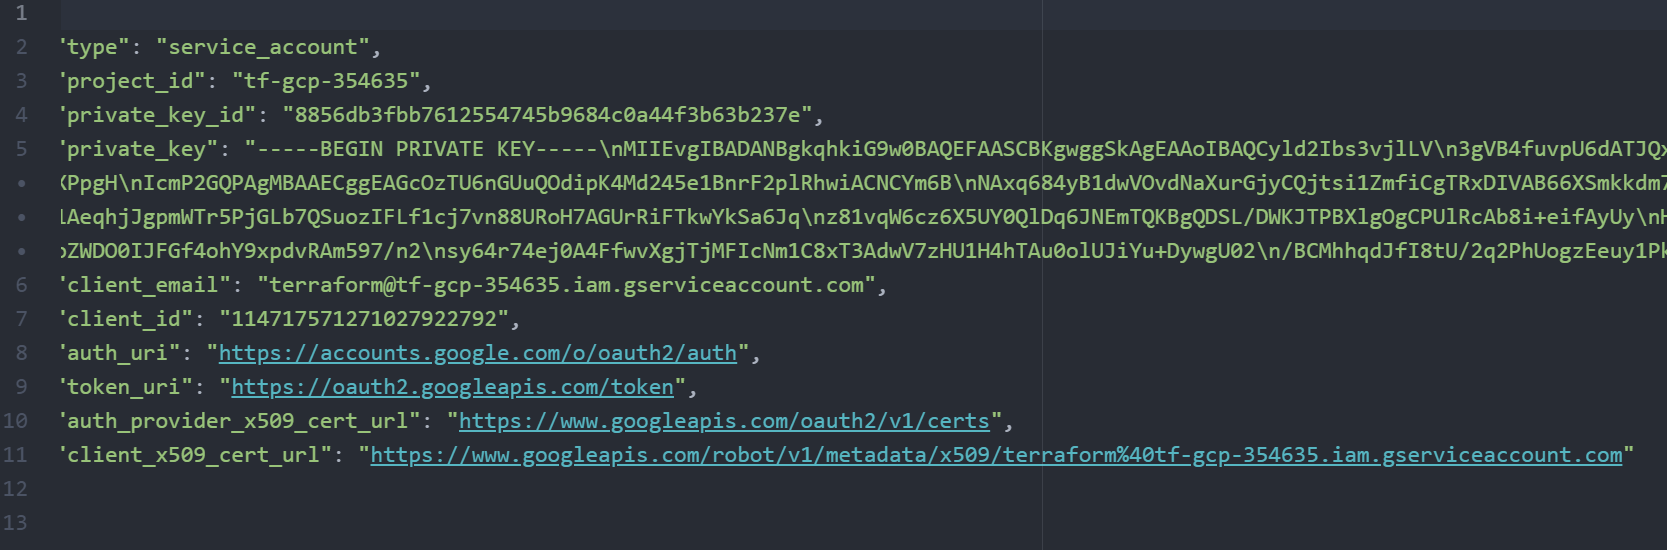
Next, I am going to move a copy of this key onto my Ubuntu system, placing it in a directory called “accesskey” and renaming the file “service_account.json”
For more information see Getting started with Terraform on Google Cloud.
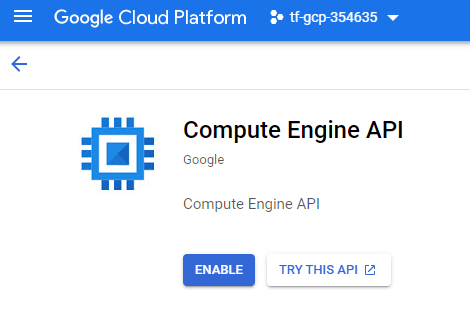
Enable The GCE Service
Since this is a new project, we will need to enable the GCE service via the web console.
Install Terraform
Run the following commands to download and install terraform:
sudo apt install -y unzip
wget https://releases.hashicorp.com/terraform/0.15.1/terraform_0.15.1_linux_amd64.zip -O /tmp/terraform.zip
sudo unzip /tmp/terraform.zip -d /usr/local/bin/
rm /tmp/terraform.zip
confirm the version and execution:
terraform --version
You should see the following:
ubuntu@unbuntu:~$ terraform --version
Terraform v0.15.1
on linux_amd64
Create main.tf file
Using a text editor such as vim or nano, create a file called main.tf and insert the following contents (from the show notes webpage for this episode):
variable "gce_ssh_user" {}
variable "gce_ssh_pub_key_file" {}
variable "gcp_project" {}
variable "gcp_region" {}
variable "gcp_zone" {}
variable "gcp_key_file" {}

provider "google" {
  credentials = file(var.gcp_key_file)
  project = var.gcp_project
  region  = var.gcp_region
  zone    = var.gcp_zone
}

resource "google_compute_address" "static" {
  name = "ipv4-address"
}

resource "google_compute_instance" "vm_instance" {
  name         = "terraform-instance"
  machine_type = "f1-micro"

  boot_disk {
    initialize_params {
      image = "ubuntu-os-cloud/ubuntu-2004-focal-v20210415"
    }
  }

  network_interface {
    network = google_compute_network.vpc_network.self_link
    access_config {
      nat_ip = google_compute_address.static.address
      }
  }

metadata = {
  sshKeys = "${var.gce_ssh_user}:${file(var.gce_ssh_pub_key_file)}"
  }

tags = ["ssh-server"]

}

resource "google_compute_network" "vpc_network" {
  name                    = "vpc-network"
  auto_create_subnetworks = "true"
}

resource "google_compute_firewall" "ssh-server" {
  name    = "default-allow-ssh-terraform"
  network = google_compute_network.vpc_network.name

  allow {
    protocol = "tcp"
    ports    = ["22"]
  }

  // Allow traffic from everywhere to instances with an ssh-server tag
  source_ranges = ["0.0.0.0/0"]
  target_tags   = ["ssh-server"]
}

output "ip" {
  value = google_compute_instance.vm_instance.network_interface.0.access_config.0.nat_ip
}
Create terraform.tfvars file
Follow a similar process to create a file called terraform.tfvars and insert the following contents (from the show notes webpage for this episode):
gce_ssh_user ="sans"
gce_ssh_pub_key_file = "~/.ssh/id_rsa.pub"
gcp_project = "PROJECT_ID"
gcp_region  = "us-central1"
gcp_zone    = "us-central1-a"
gcp_key_file = "~/accesskey/service_account.json"
NOTE: Be sure to replace PROJECT_ID with the project id that was created at the beginning of this demo.
Perform Initial Deployment
Run the following command to initialize terraform:
terraform init
You will see something like:
ubuntu@ubuntu:~$ terraform init

Initializing the backend...

Initializing provider plugins...
- Finding latest version of hashicorp/google...
- Installing hashicorp/google v3.65.0...
- Installed hashicorp/google v3.65.0 (signed by HashiCorp)

Terraform has created a lock file .terraform.lock.hcl to record the provider
selections it made above. Include this file in your version control repository
so that Terraform can guarantee to make the same selections by default when
you run "terraform init" in the future.

Terraform has been successfully initialized!

You may now begin working with Terraform. Try running "terraform plan" to see
any changes that are required for your infrastructure. All Terraform commands
should now work.

If you ever set or change modules or backend configuration for Terraform,
rerun this command to reinitialize your working directory. If you forget, other
commands will detect it and remind you to do so if necessary.
Now push out the configuration to GCP:
terraform apply
Upon completion, we will see results that look similar to:

SSH into the new GCE instance
SSH into the GCE instance using the following command but substituting the output of the terraform script to “IP_ADDRESS”
ssh -i ~/.ssh/id_rsa sans@IP_ADDRESS
Clean up
Now that we have completed the demo, clean up by doing the following:
- Exit from the SSH Session
- Run
terraform destroyto tear down the GCE resources - Destroy the GCP project by navigating to “IAM & Admin” in the Web Console and selecting “settings.” Then click “SHUTDOWN”
Wrap Up
That’s it! Now you know the basics of provisioning a Google Compute Engine virtual machine. This lays the foundation for future episodes where we will use this Infrastructure as Code (IaC). Remember to check out https://youtu.be/5L6yxXXn0-I for a more detailed explanation of Terraform.
If you have thoughts or comments on today’s episode, feel free to chime in on our moderated Google Group by shooting a note to head-in-the-clouds-security@googlegroups.com.
If you appreciate this video and want to see more like it, be sure to give it a “thumbs up.”
I also want to announce that we have the SANS CloudSecNext Summit comming up in June, on 6/3-6/4. Vist sans.org/CloudSecNextSummit for details and to register. We are anticipating upwards of 10,000 attendees. I will be a chair of one of the tracks. I’m looking forward to this, these summits are always lots of fun and a great source of information.

Stay tuned for another installment of “Head in the Clouds” as announcements of new episodes are made on the SANS Cloud Security Twitter feed.
Meanwhile, be sure to check out the other great videos on the SANS Cloud Security YouTube Channel.
Take care.