
Episode 3 – Things to Remember When using SSH in the Cloud
Welcome to Episode 3 of the “Head in the Clouds” Video Series. I am Ken Hartman, a SANS Certified Instructor and content creator for the SANS Cloud Curriculum.
Today’s episode is titled: “Things to Remember When using SSH in the Cloud”
The major cloud service providers have made it so easy to use SSH to connect to their virtual machines, that it can be easy to forget some of the security implications. In today’s session, we are going to review some SSH concepts and then we will highlight some important security considerations.
SSH works pretty much the same for the big three CSPs. Let’s start by taking a look at AWS. For those of you who have launched a thousand virtual machines, this may feel like a review. But we are going to slow down and talk about all that is going on behind the scenes and be mindful of security as we do it.
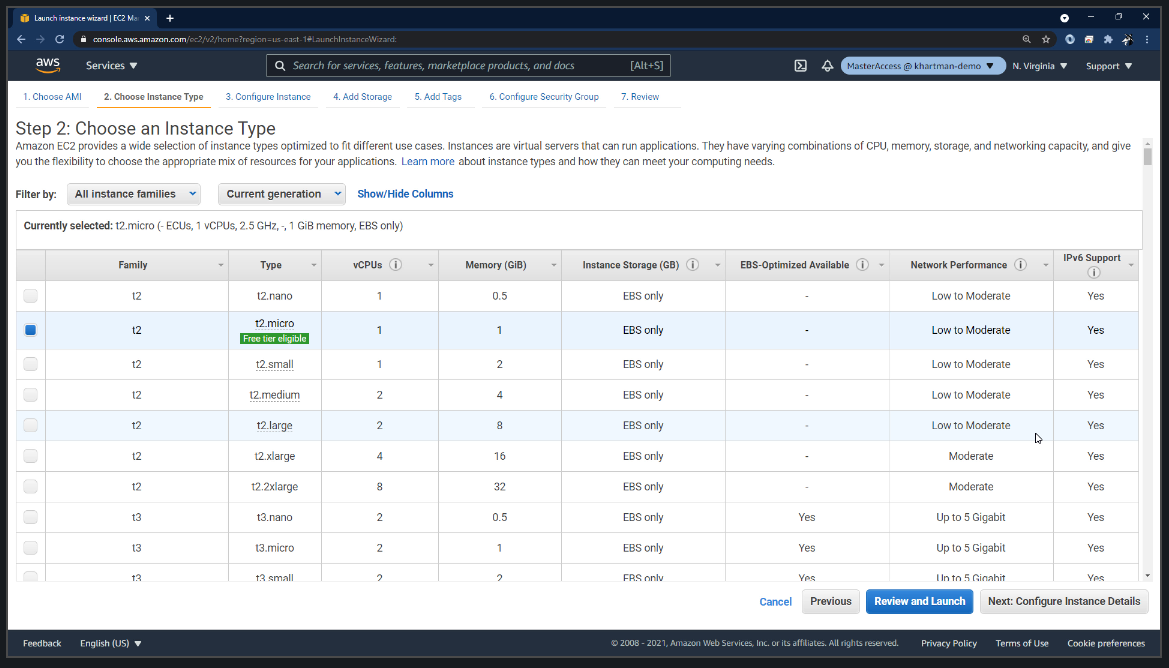
In AWS EC2 Console, we are going to launch the default Amazon Linux AMI and choose the T2.Micro as it is part of the free tier.
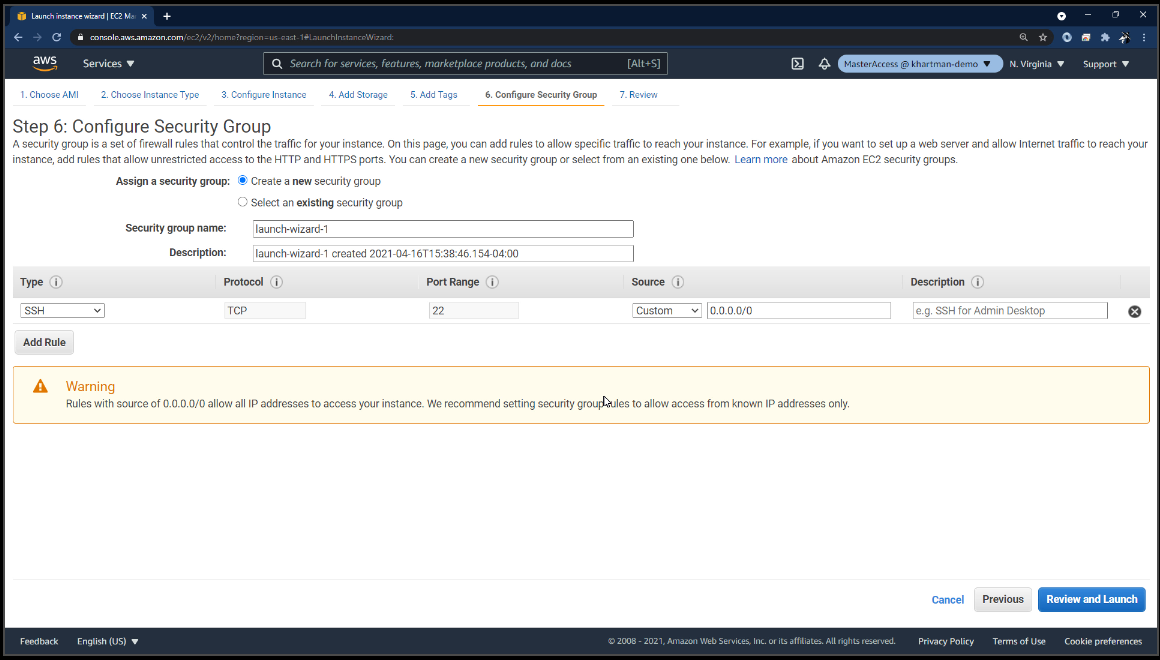
 We are just going to let it create a new security group, which many people do–but notice it has have SSH open to the world. That is a whole other set of issues and possibly another Head in the Cloud session topic. I am just calling that out as we go.
Next, I will click “launch” and it’s at this point that we get the opportunity to use an existing key pair or to have AWS create a new key pair for our instance.
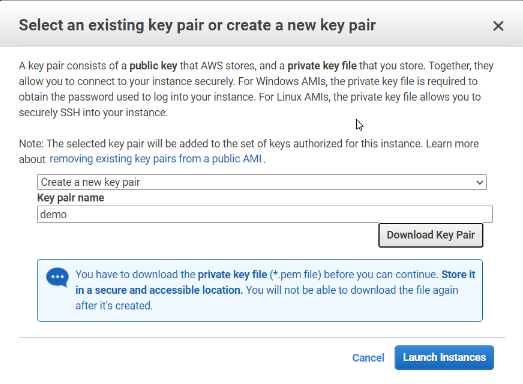
We will call this new key “demo” and here’s my one and only chance to download the key pair. I’m going to save it into my downloads. Once the VM has launched, I will cd into my downloads directory…and there is my key. Now, if I paste the SSH connection string I may or may not be able to connect…what’s going to happen?

When you see this message, it is intended to prevent a man-in-the-middle attack. So, the very first time that you connect to an EC2 instance (or any remote host for that matter) you should expect to see this warning.

In subsequent connections, assuming that the DNS name has not changed, you should not see this message. Don’t just mindlessly blow past this warning! Think about what it’s telling you, and one of the things that it’s doing is it’s providing you with the fingerprint for the key and then the SSH client adds that a file to keep track of it. I am going to say “yes” and then—Oops! …I’m getting a warning. The reason why I’m getting a warning is because I don’t have the appropriate permissions on my demo.pem file.
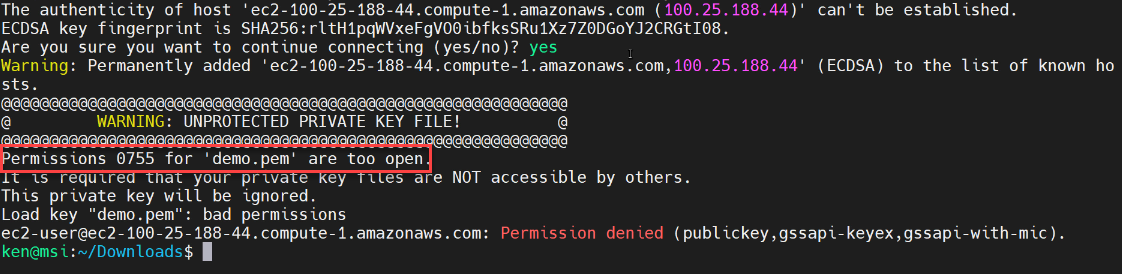
The warning indicates that the default permissions of 755 is way too open.
So, lets run a ls -als and take a much closer look. Now, we can see the permissions. What I need to do is change to 400 permissions. So, I run chmod 400 demo.pem and look at the permissions again.

Now the permissions are “read-only by the owner.” And now, I should be able to connect to the EC2 Instance.

Also notice that I did not get the MITM warning because I’ve previously connected. Alright, so we’ve authenticated to our easy to instance using SSH public key authentication. Now let’s take a look at the public key. We can see that it is an RSA type of key, and here is the public key:

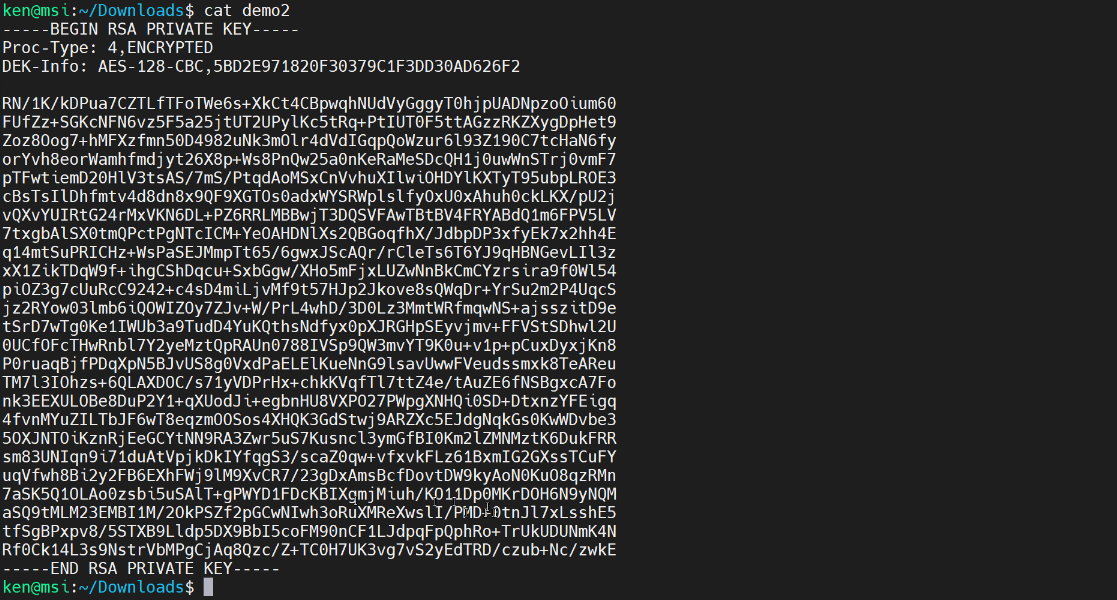
Next, let’s take a look at the private key. To do that, I need exit back out. I am still in my downloads directory so I can use cat demo.pem to examine the key.
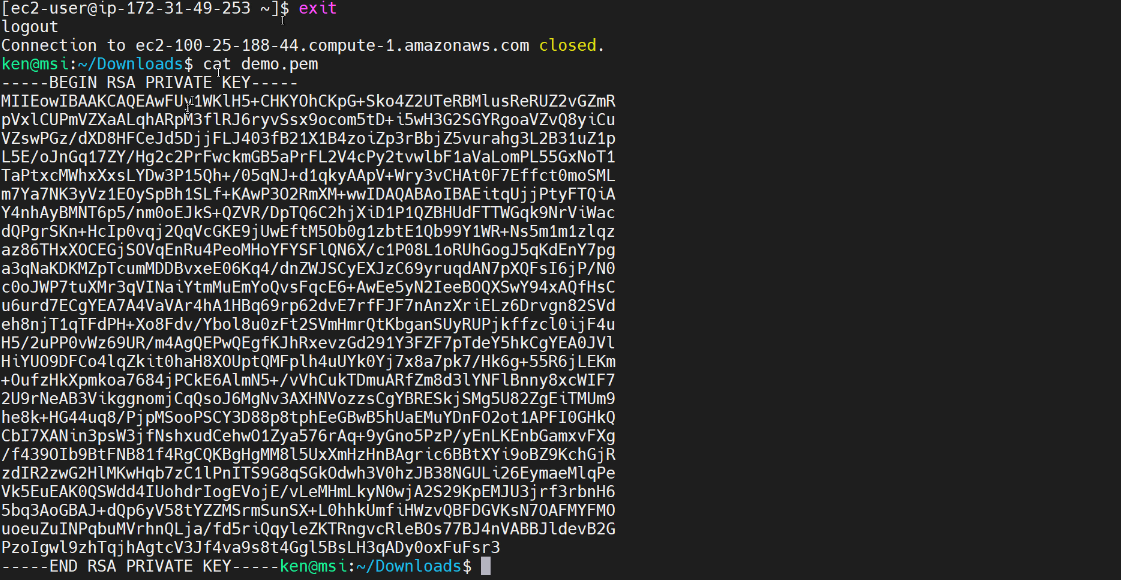
We can see that the text file starts with “private key” and ends “private key” as well. Now this key should be carefully protected and of course even though I showed it to you, I will be deleting it immediately after this recording, but I’ve seen various organizations make copies of their private keys and upload them to their box.com account, for example, and share it across multiple production operators! Let me ask you if everybody’s logging in ec2-user using the same private key, how do you have accountability for who is making what changes on your virtual machines? Okay the next thing that I wanted to do was take a look and see what the public key looks like in the console.
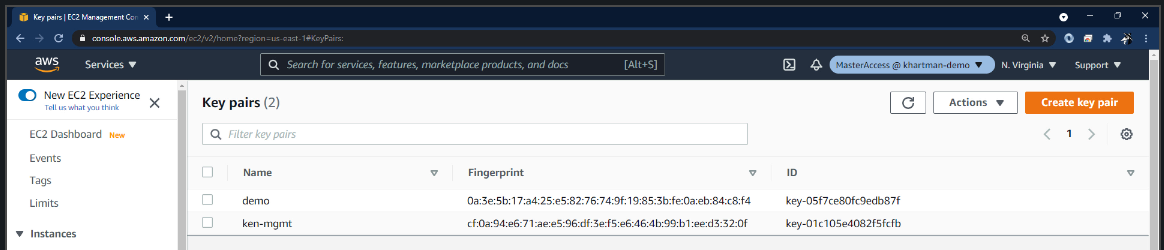
I can see that I have a pre-existing key (from prior to the launching the virtual machine) and I have the key that was made when I launched this virtual machine, but by just looking at this I cannot tell which key is older than the other and this has been a frustration of mine.
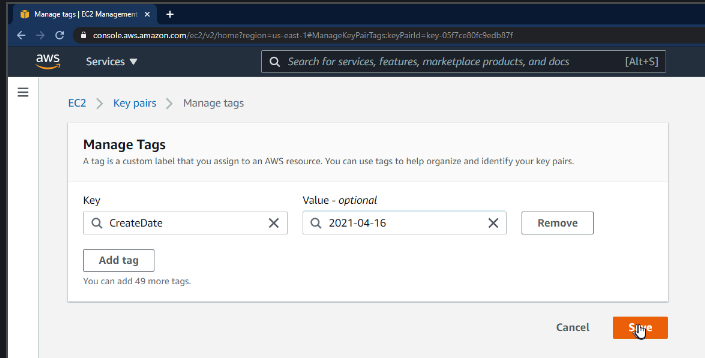
Fortunately, AWS has added the ability to tag the key, so I would recommend that you do is to tag the key with its “create date.”
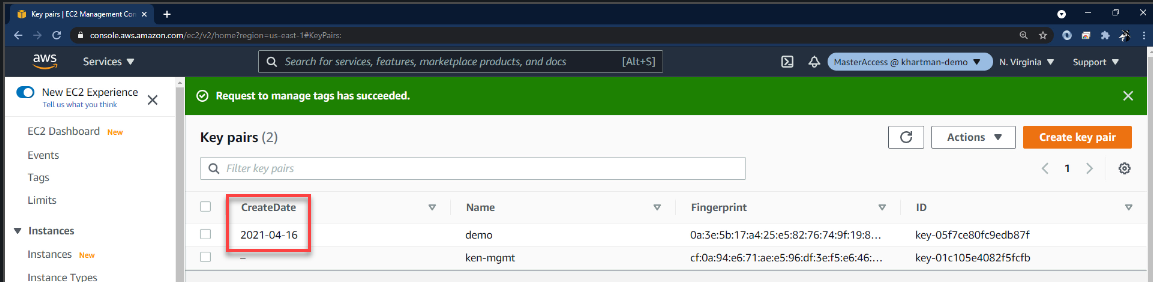
We can also have it display in the console, and this may help you with key management because you need to be rotating your SSH key pairs, just like you would rotate your AWS access keys and your passwords for all user accounts.
I can tell you that in many organizations the SSH keys are neglected. If it’s so important to rotate your keys, how does one to go about doing that?
To generate a public-private key pair, we use the ssh-keygen command. You need to provide a location and file name.

Notice that, by default it is stored in the SSH directory and given a name of id_rsa but I wanted it to be in the current directory. So, I use a single period and then, give it the name of “demo2.”
Next, I’m prompted for a passphrase. A passphrase protects the private key above and beyond the operating system protections due to the fact that creating it in my home directory.

Now if we do an ls we will see that we have two new files. One is called “demo2” which is my private key. Notice that the command didn’t attack on the “pem” file extension? That is something that AWS does, but we see the demo2 file has a very similar structure to the other private key that was generated by AWS.
Notice that the key material is different. Again the private key is something that you definitely want to make sure you have protected.
Next, take a look at our demo2.pub key file. It looks very much like that authorized_keys file that we saw on our virtual machine.

Let’s insert this new public key into our virtual machine. The easiest way is just to copy it and then SSH in and append the copied contents onto the existing authorized_keys file.
NOTE: To rotate the SSH Public Key, you would delete the original. Now, we should be able to login with either one of our keys.

Now we have authenticated with the other private key. While we are still logged in, let’s take a look at /var/log/secure.
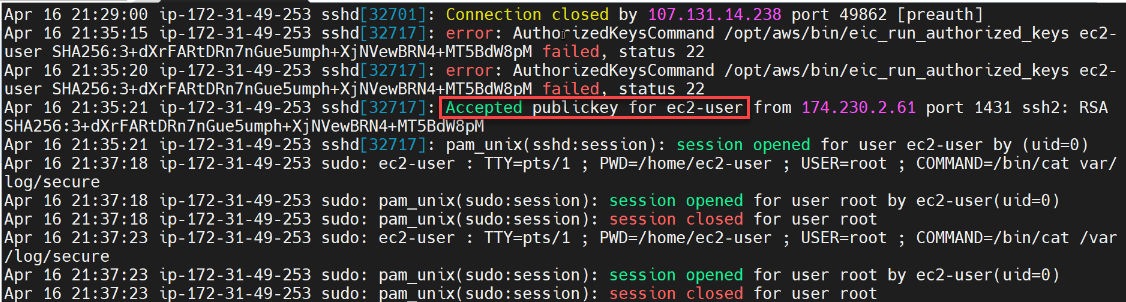 We can see that we’ve got multiple times where we have a message that says “Accepted public key for ec2-user.” So let’s go ahead and do a grep for that string:
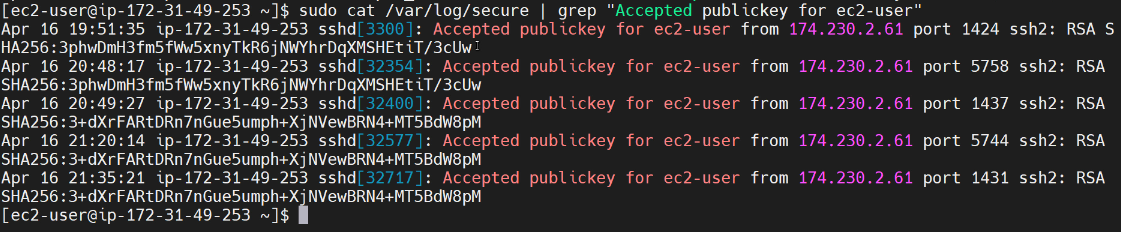
We can see that we have two different SHA256 values. Where did those two different SHA256 values come from? They are the SHA256 hash of the public keys.
The easiest way to demonstrate that is, if we exit out of our SSH session and then we can use ssh-keygen command with the -lf switch:

We can see that it does indeed match. What about the other one? Well, we don’t have a local copy of that one. So, let’s log back into our EC2 instance and change into our .ssh directory.
When we do a ls we can see that we have the authorized_keys file, so here again we use the keygen command:

Important Points
Never forget that the point of this exercise is that you have to monitor your SSH authentication logs, not just for the username but also the SSH key hash that was used, and yes, the public key is public but don’t let an attacker insert their public key into your virtual machines.
In addition, you may want to use file integrity monitoring for your .ssh folder (or at least your authorized_keys file).
Also, it’s very important to know the scope, age, and the provenance of all SSH keys on all of your systems as well as to which identities each key is bound.
Wrap Up
My hope is that that information is helped you up your cloud game when it comes to SSH. Also, if you can—avoid SSH completely. The major cloud service providers each have provided options (but each option is different) so that you can avoid having to manage SSH keys across your cloud fleet.
If you have thoughts or comments on today’s episode, feel free to chime in on our moderated Google Group by shooting a note to head-in-the-clouds-security@googlegroups.com.
Stay tuned for another installment of “Head in the Clouds” as announcements of new episodes are made on the SANS Cloud Security Twitter feed.
Meanwhile, be sure to check out the other great videos on the SANS Cloud Security YouTube Channel.
Take care.