
Episode 17 - Introducing AWS CloudShell - Get Working Faster
Welcome to Episode 17 of the “Head in the Clouds” Video Series. I am Ken Hartman, a SANS Certified Instructor and content creator for the SANS Cloud Security Curriculum.
Today’s episode is titled: “Introducing AWS CloudShell - Get Working Faster”
Today we have a guest contributor…Shaun McCullough. Shaun is a good friend and fellow SANS Instructor and it’s my pleasure to introduce him to you all.
Shaun’s Intro
Ken, thank you so much.
I’m going to talk about the AWS cloud Shell. This is a tool or service that Amazon released not too long ago. Azure has one very much similar to it, and the whole goal of this thing is to allow you to run commands in the AWS environment without having to spin up a virtual machine and log into the virtual machine. I’m not talking about logging into the EC2 and running commands on the virtual machine. I’m talking about doing things like hey, query and tell me all of my EC2’s that are in the environment. Or create an S3 bucket. If I wanted to do that, I would have to create a virtual machine, log into it. Or, I would have to use AWS workspaces, or maybe I have created a key and I have long running IAM user and that key material is installed on my home computer and I’ve used AWS configure to add the key information that’s creating and pre provisioning infrastructure, which is great for some cases.
But if I want to just run really quick commands or I don’t do it very often, I may not want to spin up a virtual machine. That’s where cloud Shell comes in. Cloud Shell allows me, with one single quick click, to have full access to whatever permissions I have been granted in my account. To be able to run AWS management commands in a controlled environment. So let’s take a look at it.
CloudShell
So we’re gonna click this icon right here if you hover over it says cloud shell and that is going to start spinning up the cloud shell environment.
![]()
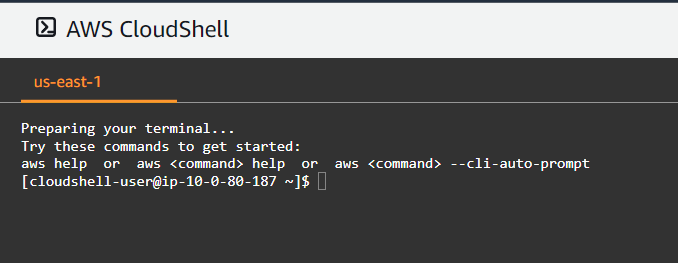
Now the welcome screen tells me that there are some preinstalled tools like the cli python nodes there, I get one gigabyte of free storage per region. I’m not paying for this service, not paying lambda or virtual machine compute cycles. I’m getting this for free, but it is limited. So here we’ll hit close and just move on.
Here is my terminal. Now I have a shell, like I would be if I was had SSH’ed to a computer, but I’m running on some kind of compute system that AWS has provided.
I don’t have access to it from the outside. If I go over here and I go to EC2 and I open up my EC2’s, I don’t have access to this thing that I’m using in this cloud shell. It’s only right here inside this construct in this window. So I’m gonna do an ls. I don’t have any files other than this basic repository. I’m running as user cloudshell-user. I can see that I’m the only user, there’s also a lost and found, but I’m the only user.
[cloudshell-user@ip-10-0-80-187 ~]$ ls
[cloudshell-user@ip-10-0-80-187 ~]$ whoami
cloudshell-user
[cloudshell-user@ip-10-0-80-187 ~]$ ls /home
cloudshell-user  lost+found
[cloudshell-user@ip-10-0-80-187 ~]$
This is just for me. So I’ve logged into this account, I have a certain number of privileges in this account. It’s admin for this particular case; any access management privileges has been applied to this console, so I can do everything here that I would, I could do if I was click, click, clicking through the GUI. Now I usually would use this if I was going to run some kind of AWS CLI command. So I do a aws --version.
[cloudshell-user@ip-10-0-80-187 ~]$ aws --version
aws-cli/2.4.6 Python/3.8.8 Linux/4.14.252-195.483.amzn2.x86_64 exec-env/CloudShell exe/x86_64.amzn.2 prompt/off
[cloudshell-user@ip-10-0-80-187 ~]$
You can see that AWS is installed which is nice. May not be the most up-to-date version, but you can update it. We’ll talk about that in a second. I also have jq. So if I want to do some cool stuff like Ken talked about in an earlier episode of Head in the Clouds.
[cloudshell-user@ip-10-0-80-187 ~]$ jq --version
jq-1.5
[cloudshell-user@ip-10-0-80-187 ~]$
I have jq, NodeJS plus Python. Also Python3 I believe.
[cloudshell-user@ip-10-0-80-187 ~]$ python --version
Python 2.7.18
[cloudshell-user@ip-10-0-80-187 ~]$ python3 --version
Python 3.7.10
[cloudshell-user@ip-10-0-80-187 ~]$
So I have some tools here.
https://docs.aws.amazon.com/cloudshell/latest/userguide/vm-specs.html
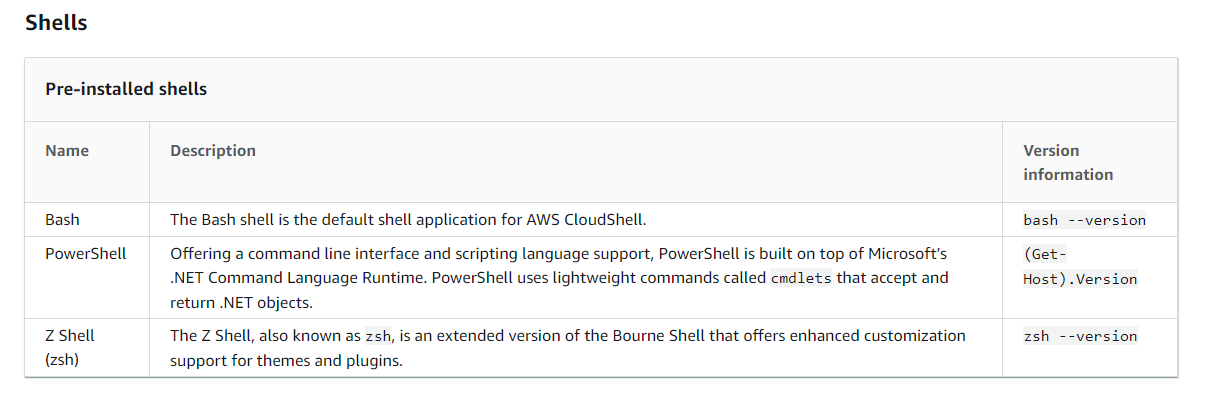
But this link here has all of the things that are pre-installed. For instance, I have Bash, I have PowerShell, and I have Z shell already pre-installed.
I have different Amazon command line tools. I have AWS CLI I have the Elastic Beanstalk and ECS CLI and the SAM specific ones.

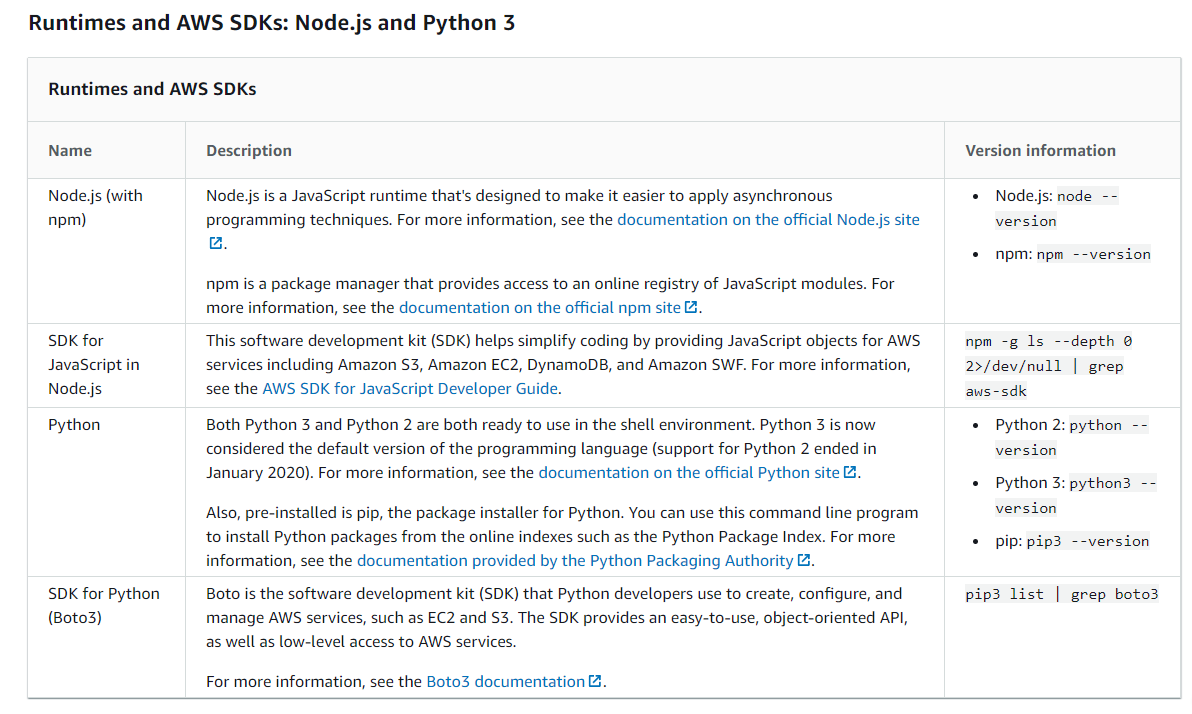
The SAM CLI actually is a is a really cool thing, if you want to be able to use this to quickly spin up serverless applications. You could do it right here from the cloud shell. I also have a bunch of runtimes here. I got Python, I also have Boto3, I have and then here’s some development tools that are installed like jq as we talked about.
Shell Customization
So this is everything that is installed now. There’s probably something else you would want installed in there. So what are we going do about that? We could install things. Let’s create a file. So we will use VI to create a file called test.txt. And I will put Ken is great for the contents.
[cloudshell-user@ip-10-0-80-187 ~]$ ls
test.txt
[cloudshell-user@ip-10-0-80-187 ~]$
You can see that that file has been created– test.txt. So I have that in my environment. I can also install things. So let’s do an installation of nano. So I would use sudo.
[cloudshell-user@ip-10-0-80-187 ~]$ sudo yum install nano -y
Loaded plugins: ovl, priorities
Resolving Dependencies
--> Running transaction check
---> Package nano.x86_64 0:2.9.8-2.amzn2.0.1 will be installed
--> Finished Dependency Resolution

Dependencies Resolved

===================================================================================================================================================================================================================================
 Package                                          Arch                                               Version                                                          Repository                                              Size
===================================================================================================================================================================================================================================
Installing:
 nano                                             x86_64                                             2.9.8-2.amzn2.0.1                                                amzn2-core                                             571 k

Transaction Summary
===================================================================================================================================================================================================================================
Install  1 Package

Total download size: 571 k
Installed size: 2.2 M
Downloading packages:
nano-2.9.8-2.amzn2.0.1.x86_64.rpm                                                                                                                                                                           | 571 kB  00:00:00
Running transaction check
Running transaction test
Transaction test succeeded
Running transaction
  Installing : nano-2.9.8-2.amzn2.0.1.x86_64                                                                                                                                                                                   1/1
  Verifying  : nano-2.9.8-2.amzn2.0.1.x86_64                                                                                                                                                                                   1/1

Installed:
  nano.x86_64 0:2.9.8-2.amzn2.0.1

Complete!
[cloudshell-user@ip-10-0-80-187 ~]$
So I have some programs so I can install things in this environment, I have up to a GB to play with, as I mentioned before. We can also run AWS commands, like aws ec2 describe-instances
[cloudshell-user@ip-10-0-80-187 ~]$ aws ec2 describe-instances
{
    "Reservations": [
        {
            "Groups": [],
            "Instances": [
                {
                    "AmiLaunchIndex": 0,
                    "ImageId": "ami-047a51fa27710816e",
<snip>
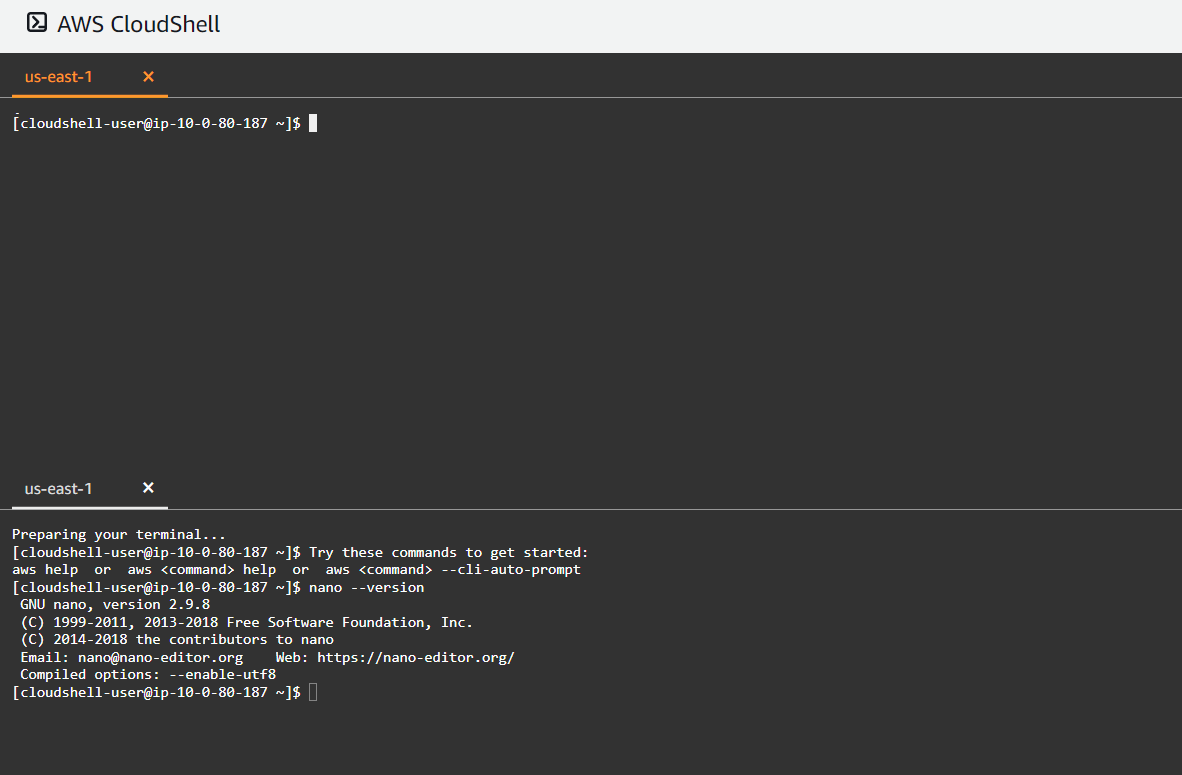
So I can actually run commands, so we have that. Really cool. Alright, here’s some other nice little features I have with this. I have a single screen here, but maybe I’m running tail, I want to tail a log file and I’m gonna continuously monitor something and then I want to run some other commands as this instance. I can do actions and I hit new tab so you can see, I can flip between my tabs here.
That’s pretty interesting. I can also split my taps so I can watch have them both open at the same time. I can set some features like whether I want it light and dark, all those kind of nice features. I also can upload or download files directly to the CloudShell. So if I have scripts locally, I can get them into this environment without having to do a big copy and paste situation.
All right, so in my other shell that I opened up, I still have nano because that environment has been kept.
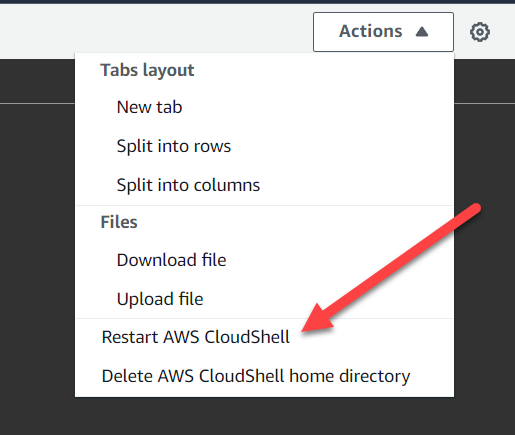
I close my sessions, and then I click the icon again and I have a new session. Let me do an ls , there’s my test.txt and I still have nano. So what I installed before is still there actually the compute that’s running behind it, which I’m sure it’s some kind of container, is up and alive. I can restart it, I can go to actions and I can do restart shell.

It’s gonna disconnect me from all of my open sessions, it’s going to rebuild the container. It will take about 30 seconds.
One thing to note is that this is not great for heavy development. The reason is because it is a little bit of pain to move files in and out. I can click the upload and the download, but if I’m doing software development, I’m building some kind of application. I can run NodeJS, sure. But I don’t have an integrated development environment and other tools that I might be interested in inside of this environment. A development environment is usually highly customized.
It’s also kind of slow. You can see that it takes about 30 seconds for the environment to be started up for the first time. But if you’re going to jump in and do queries every once in a while, it does make sense.
Now I’ve got the new shell, I’m gonna clear and I’m gonna do ls …look, my file is still there. But nano is not. So I do have files, but things that I have installed may not stick around. This is one of the problems things kind of change in this environment and I would have to do another installation because I did restart it.
NOTE: To install applications to be persistent, they must be installed in your local $HOME directory. Files installed outside $HOME, such as when we do a sudo yum install nano, will be deleted after the session.
Deleting the Session
So one of the recommendations AWS has for this is if you’re going to install some of these tools that you use regularly put them in your .bashrc file, so that they get installed every single time a new session starts.
Maybe I’ve messed something up or I’m done with my work and I want a completely new environment then you can do a delete from actions. You can delete $HOME directory. If I click this and I say yes I delete, I’m going to get a new environment, I’m going to lose that $HOME directory.
And so that file that test.txt is no longer going to be there. And again it’s probably gonna take about the 30 seconds for it to load.
Wrap Up
So that is it for the cloud shell. Hope it gives you a little bit of an idea of what it is and you can start thinking about how you might want to be able to use it, especially for an administration or just jumping in and doing something quick. This is how I use it.
Especially nice if you’re moving from account to account, you don’t have to manage that account access is in your local environment, you can just click to a new management console and then being able to click the CloudShell button.
Alright, I’m Shaun McCullough, thank you for listening and have a great day.
Closing Comments
Fantastic, thanks Shaun.
If you have thoughts or comments on today’s episode, feel free to chime in on the comments for this YouTube video.
If you appreciate this video and want to see more like it, be sure to give it a “thumbs up.”
Stay tuned for another installment of “Head in the Clouds” as announcements of new episodes are made on the SANS Cloud Security Twitter feed.
Meanwhile, be sure to check out the other great videos on the SANS Cloud Security YouTube Channel.
Take care.